Clients are the life blood of any business! To build your client structure in your JCards account, always start by creating a client. These steps apply to the mobile app only.
Watch Video Guide
Steps
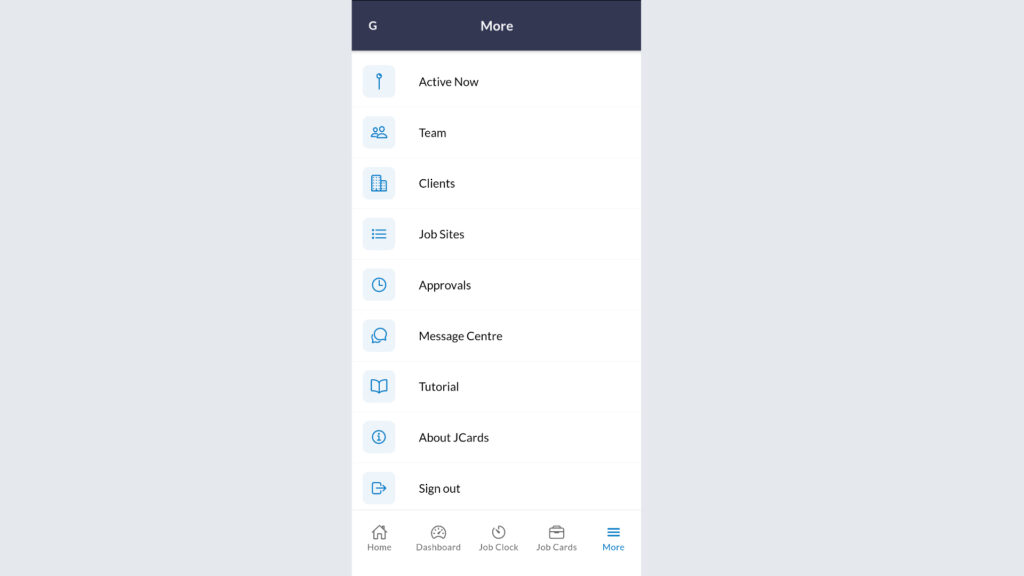
In the mobile app, Select the “More” tab on the bottom navigation bar and select “Clients”.
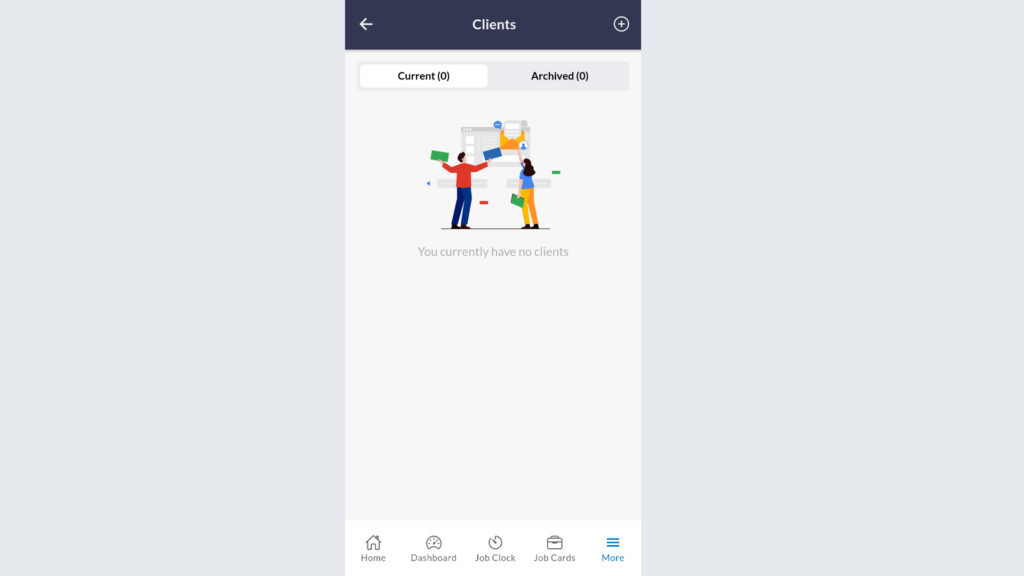
Select the “+” symbol on the top right corner to create a new Client profile.
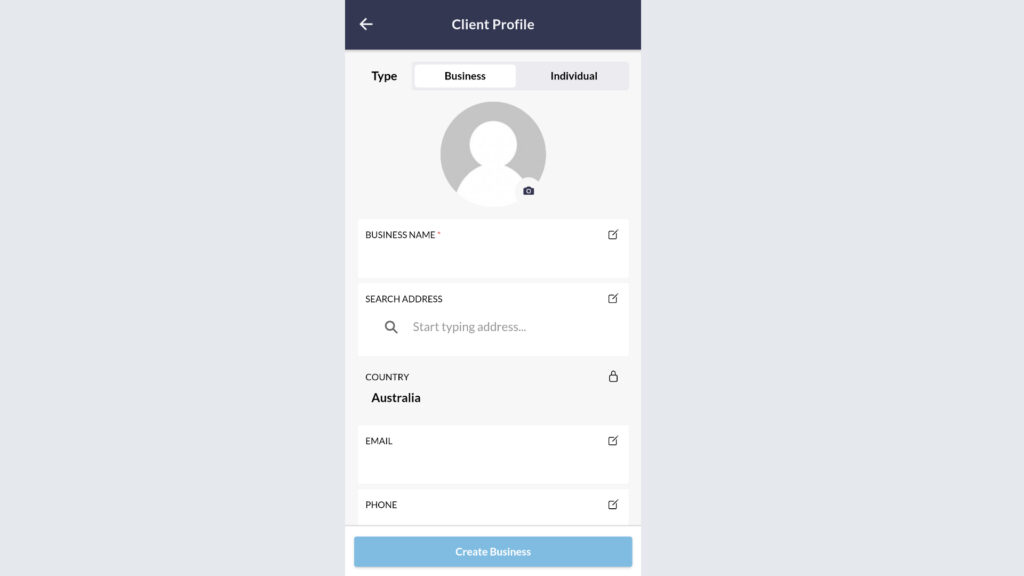
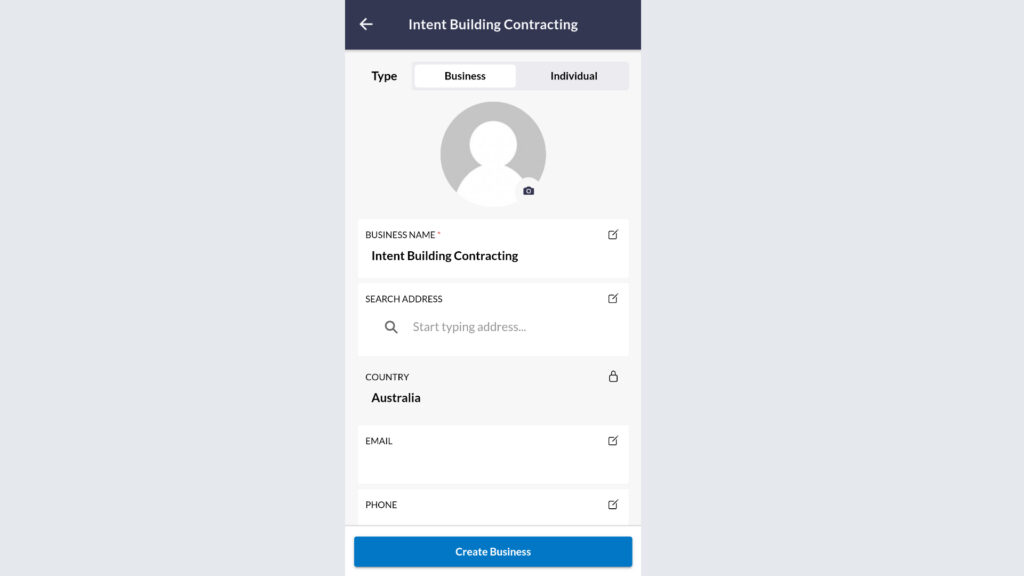
Select the client type using the Business or Individual toggler. In this example we will use Business.
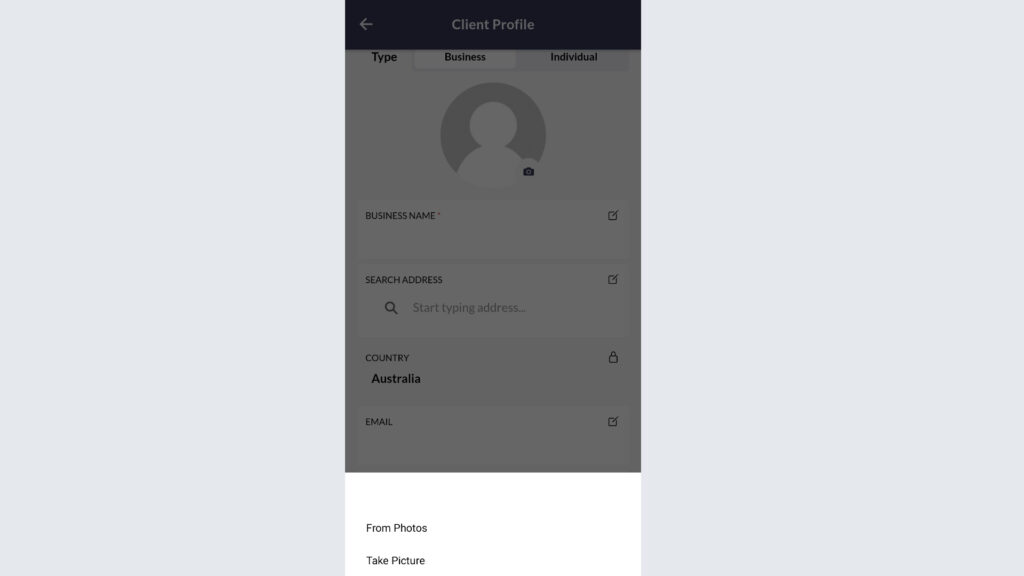
Add a logo or graphic to represent the client either by taking a photo, uploading a photo or uploading an image of the company logo.
In the case of a Business client, insert the business name, e.g. “Intent Building Contracting”.
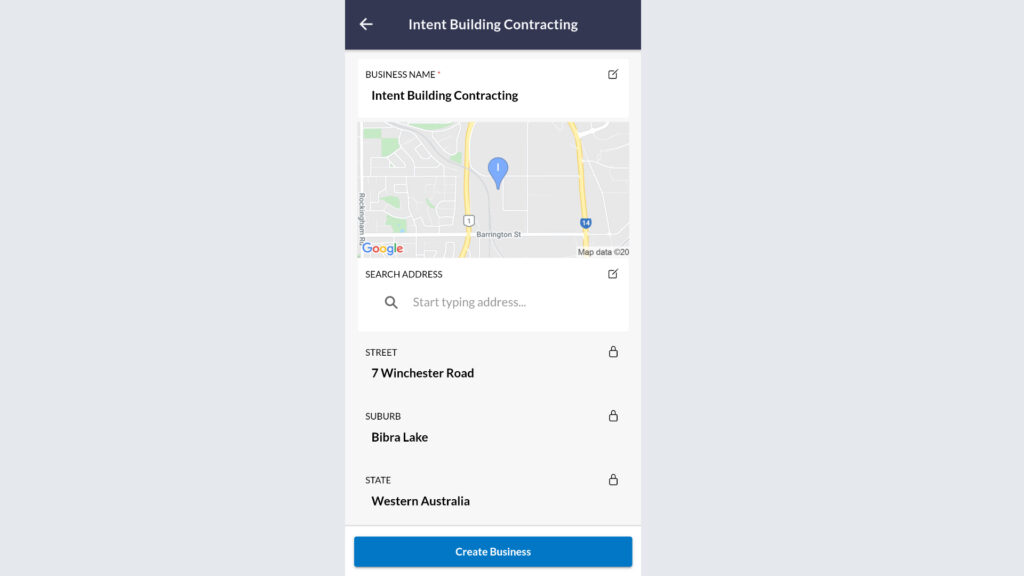
Add your Client’s address into the Address field. This will locate the specified address on Google Maps.
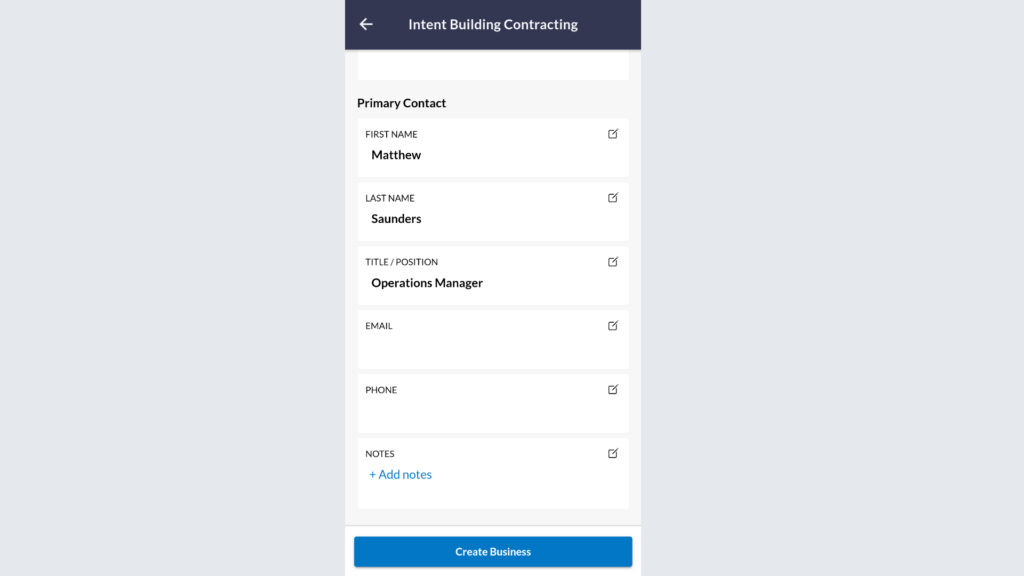
Add other information such as Primary Contact details and Notes at any time.
Select “Create Business” and it will appear on your Clients list.
You have successfully created your first Client.
We hope our Article assisted with your JCards account setup. If you have any questions please get in touch via support@jcards.com.au